Showing posts with label Miser. Show all posts

Friday, 20 February 2015

Misers basing materials.


Basing Materials: Sand, Gravel and Rock

Once again I'm back with my penny pinching ways to offer you another way of saving vital cash for miniatures.

This one is all about simple yet effective basing substrate on the cheap.

A few companies have been flogging sand and grit to gamers at greatly inflated prices for a while now so it is time to try and counter it.

One of the problems with buying such stuff on the cheap is that the cheapest available tend to be for use with the building, gardening, or landscaping trades. And this means bulk. None of us are really going to need 25kg of sand so the first examples are nice small manageable quantities at low low prices.


Grit

Mavis is right, I swear by it too!
I use the Wilko brand from the Wilkinsons (UK) chain of stores but I'm sure Pets at Home, Walmart or whatever your local cheap stuff or pet supplies store will have something of similar ilk.

At the time of purchase (2nd Dec 2012) I picked up this 1kg bag up for £1, whilst 1kg is still a bit much for basing it's easy enough to store away in an old coffee jar and stick in a cupboard. It can be a bit rough on it's own so I blend it with sand to get a mix of size granulation.(It's 2015 now and I still have plenty.)


Sand

I don't really care about Mavis's digestive system but if you want fine grade sand for your bases this is a good one.Once again this is the Wilko brand and like the grit you should be able to find it in most stores selling pet supplies.

Same price too, £1 for 1kg.

Personally I don't use sand on it's own as I find after spray undercoating then painting it starts to lose some of the texture and can become blobbish.


Blend of Sand and Grit

What I have done here is blend the sand and grit together in a small wide necked jar (Crisp/Chip dip jars are ideal) so that I can dip in model bases covered in PVA glue to coat them in the grit mix. A rough guide is 1 part sand to 2 or 3 parts grit but it's something that you should play about with til you're happy.


The left over sand and grit I have stashed away pure in coffee jars in the loft as I don't use either in pure form and do not need them to hand.


Slate

We have to get a little bit more inventive to get small amounts of slate as it's normally sold in 25kg bags for gardens, driveways and paths or as slates for house roofs.

Also a bit of work and some tools are required to get the most out of it.


Slate Sources.

I'm going to dismiss roofing slates as a source as this is growing scarce in these days of energy efficiency awareness and is also for houses of a certain age which are not common in all parts of the world.

If you are lucky enough to live in a suburban setting you probably just need to walk round the block and you will find a household that has used the stuff in their front garden, some of it always seems to migrate out onto the public pavement/sidewalk at which point it's fair game ( Do Not be nipping over garden boundaries and helping yourself, no matter how petty it's still theft). You may even have some in your own garden or be able to visit a relative or friend who has.

If not you could visit a garden/building center, walk around the place for a bit there is bound to be some just lying around on the floor, you can probably pick up odd scraps here and there without any trouble.
Possibly honesty is the best policy with this route, you never know ask politely and the store won't mind you walking out with a handful of floor gatherings, this works best if you are making some form of purchase already mind.


Preparing and using Slate

Ok so you found some and got it home, so how do you use it?

I use Slate in 2 ways;

Large 'hero' rocks, you know the sort of thing the main man/woman/monster of your army standing heroically poses upon a jutting slab of rock (stupid really in a ballistics rich environment but hey it looks cool).

This one is just a case of pawing through your stash of slate to find a suitably angled and sized chunk.

You can use a pair of pliers, wire cutters or Mole Grips to nibble away at it to help it fit the base or re-size and shape you chosen bit of slate.
Of course wear Protective glasses or goggles, bits may well ping off during this process.
Don't forget to save up the smaller off cuts they will also be useful.


The second way is finer bits of slate used to coat bases in the same way as grit.
This requires a few simple tools and bits to prepare the slate.

Hammer, slate, old sock or work glove ( Work Gloves are better as they can take the beating) protective goggles or glasses. Area of solid concrete or some such is also a must (not many people have an anvil in the back garden).


Place you're slate in the glove or sock, only a couple of bits at a time as too much actually makes the process slower.


Select an area of good solid concrete (or your Anvil). The smoother the better - I found slabs to be the best ( don't be smashing nice new paths about btw, it causes arguments lol).


Hammertime ! First put on you're protective glasses. The glove is to capture the bits as you smash them up but is by no means guaranteed to stop sharp bits of stone flying out! (Socks even more so.)

Place the glove containing the slate on the concrete surface and have at it with the hammer


Note the damage, this is why old gloves are required, they will be no good for normal use after this.
 Also this can be a bit loud, remember you neighbours might not appreciate the noise of some loon smacking a glove full of sedimentary rock with a hammer and try to choose sensible times of day accordingly.


Over a bit of paper (so it is easier to collect up the small bits) tip out the glove.


Roughly sort out the bigger bits and pop them into a pot, then tip the smallest parts into a different pot


Then you are ready to use it on some bases.


Terracotta.

I won't go into much detail with terracotta as it will pretty much be a complete repeat of the above entry for slate. In particular the smashing up process is exactly the same.

Flower Pots Planters.
East to obtain, walk in to a garden center and buy away, when I wrote this you could get a 4 inch flower pot for about £0.55.


Tiles.
The preferred terracotta medium, once again single tiles can normally be bought in DIY shops for about 50 pence, used cunningly they are great for simulating broken slabs of concrete to denote fallen walls etc.


Quick mention on fixing all this stuff to bases.

Just a quick explanation I always use PVA glue to fix finer grade grit/slate to bases, when that is all dry I then use a water thinned PVA (about 60% water to 40% PVA) washed over it all to seal the substrate and improve the adhesion to the base.
This stops the substrate absorbing too much undercoat and paint and helps with the issue of little bits falling of and moving to places you don't want it.

With large bits of slate/terracotta I use Super Glue to fix it to the base and sometimes a bit of GS or Milliput squeezed in around the edges for extra strength.

To add a mini to the top I normally Drill and Pin all the way through the base, slate and into the model for strength, use an old drill bit as it will blunt it and be patient as you go.

Thursday, 12 February 2015

Lollypops and cotton buds.


Cotton Buds and Lollypop Sticks

Miser, skinflint, stingy git call it what you will,,but when it comes to the addiction of plastic crack every penny saved is more I can give to GW for yet more minis.

I've been found upside in dumpsters, skips and bins all around my local area salvaging interesting bits n bobs for various projects for about 22 years now.Working in recycling now has only made me worse.

It's caused some 'interesting' conversations but luckily no legal action so far.

So whats the point of the waffle? Erm.. anyway the idea is to share some of the more socially more acceptable things you might find useful.

This one is one of my all time favourites the lollypop stick (sucker stick) cotton bud (Q tip) combo.

First off select your Lolly type, it obviously has to have a hollow plastic stick and be tasty. You can just cut the lolly off and sling it if you are worried about dentist bills though, this is after all meant to be cheap.


The second part is the cotton buds, here is a bit of counter intuitive thing for a misers guide... buy the expensive ones they are made of thicker plastic and are stronger and easier to work with.


Here's the good bit, these 2 things seem to be made to go together. The cotton bud fits perfectly inside the lolly stick.


Main thing is with these is that super glue is a must, they just aint the right stuff to use plastics glue on.

That aside here is a selection of things you can do with them, although the only real limit is imagination.


Now if you are really bored you can play a quick game of spot the lollypop sticks and cotton buds...


__________________

Saturday, 7 February 2015

Cheap or even free 1mm thick plasticard styrene.


Cheap 1mm Styrene


Styrene, it's a word you'll see a lot when you read conversion blogs or see pictures of scratch built wonders.
Normally bought in hobby shops in sheets of about A4 (approx US Letter Size), sometimes referred to as Plasticard.

I have grown to hate cutting up large sheets knowing full well that later on I will want large pieces normally for some Ork gubbins and will have to go buy fresh, no matter how many offcuts I save I still end up doing it.

Free Styrene.


Mmm freee stuff.


Then the missus got into Gardening, well I say gardening, every summer she seems to go into a plant buying frenzy. These are duly planted into the garden and during the following year are eaten, dug up or just plain peed to death by our three dogs.
It was whilst clearing away the debris ready for the next years cycle of this I noticed all the labels for the deceased plants were styrene.

So start hunting round the garden ( your Mums, Grandparents etc ) for all those discarded labels or ask if they throw them away and could they save them up for you.

Cheap Styrene.


Not got a gardening friend or member of the family? Not all is lost you can buy cheap enough Plant Labels if you look around, just make sure they are styrene by avoiding and Rot Proof ones they will normally be a oily feeling type of plastic that will not take to gluing in any form, even superglue.

Using your Cheap Styrene.

If you are buying blank writable Plant Labels then you can treat it just as you would a sheet you have bought from a Hobby store.

Notes on Printed and Recycled Styrene use.

Using the recycled Printed Plant Labels is pretty much as straight forward as using new, but for the sake of completeness I will mention a few of things worth bearing in mind.

Always wash the recovered labels well, as well as the obvious compost and dirt that will be on it you never know what Pesticides and other substances might have been sprayed over it.

The print, if covering large areas can interfere with gluing a little, super glue will stick to the ink and can pull it off the surface of the styrene meaning stuff under any load stress can pull apart, liquid poly will dissolve the ink though. That said a quick rub with a bit of Emery Paper (Wet n Dry) will sort the separation issue.

The print can show through a bit if you are someone who uses very thin paint layers and washes, so another reason for a quick sand off with a bit of Emery Paper.

Free Styrene in action...


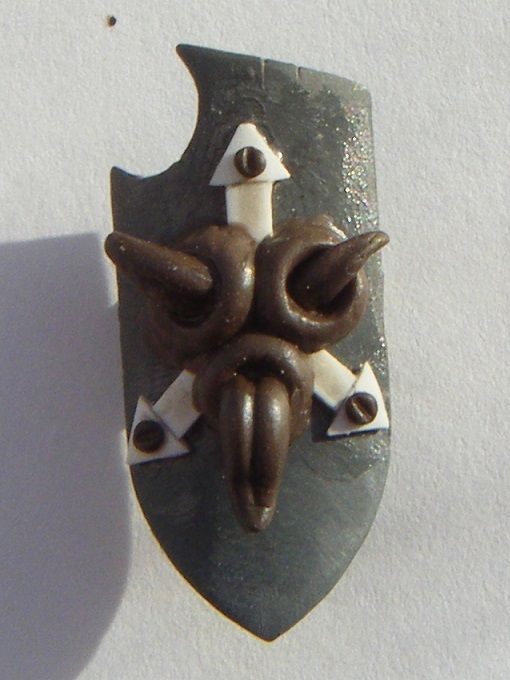
Great for Chaos trim on tanks.
Honest, I do use it for non chaos stuff.

Saturday, 17 January 2015

Uses for left over Green Stuff.


Some thing I nearly always find myself doing is mixing up more Kneadatite (Green Stuff) than I need.

I used to just stuff it under the bases of whatever mini I was working on at the time but then I had a better idea.

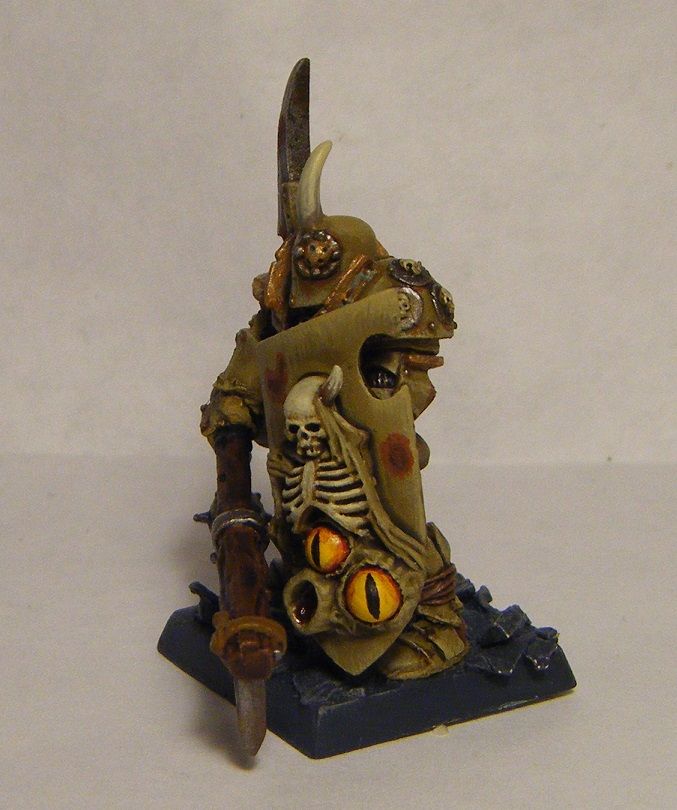
Many WHFB and 40K Armies have little things that appear on a lot of the minis through out the force, tiny, insignificant, fiddly little things that in enough quantity help make the theme. Nurgle = pox/boils, Tomb Kings = Scarab Beetles, Orks( Orcs& Goblins) = little toad stools. There are more I'm sure but those are some I have experienced myself. There is also the more generic little teeth, horns, medallions, symbols and gem etc that adorn GW minis.

Never waste a bit of GS again, use it to make pre fab bits for these details. ( If you are impatient like myself these will help speed up some of these details without the dreaded moment when you squish a bit you just finished while working on the next.


Things you'll need:
Good sharp knife, Blu/White tac ( poster stuff) Kneadatite ( GS/Green Stuff), an old paint brush and thin liquid polyester glue. Oh and a little box or pot for storage.

For this I'll just show the simplest use, but with a little extra effort and variation of shape you can fit this for most armies.

lil Green Balls.

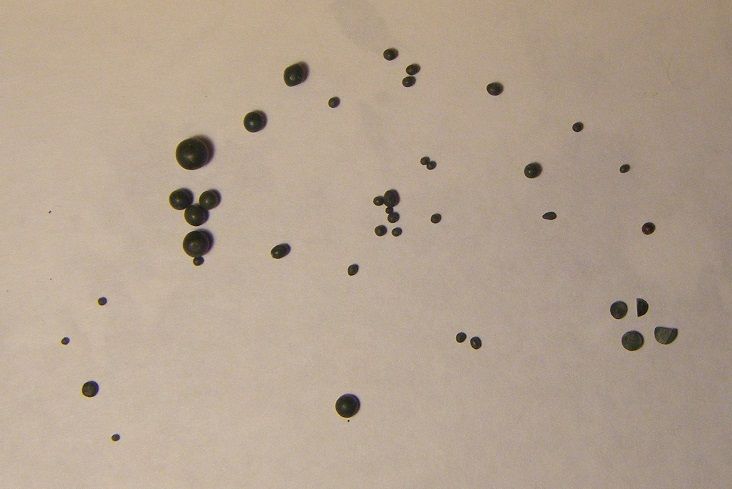
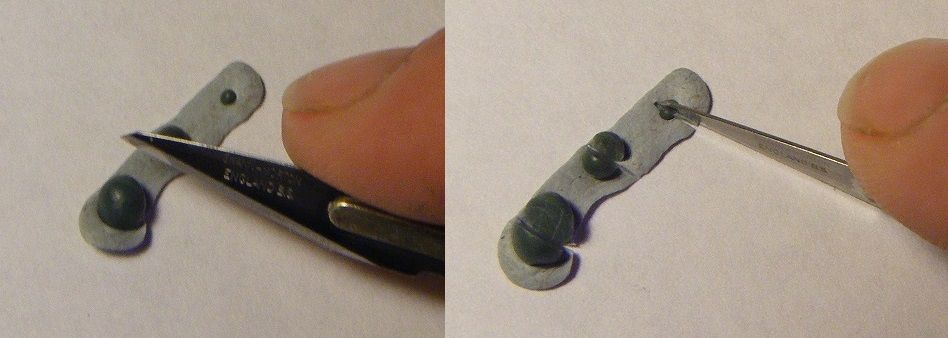
 Whenever left with some GS roll it into little balls, normally I just do this lightly in the palm of my hand with a finger tip. ( Hey Granny, I'm gonna tell you how to suck an egg!) drop em into an out of the way place or a storage pot and forget them til they are set and you are working on a model that you can use them for.


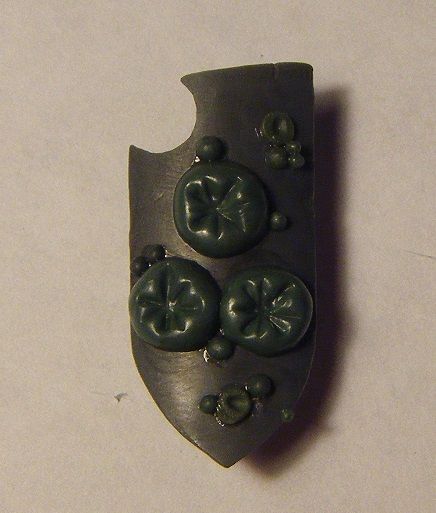
 Ok you built up a store of lil green balls, time to grab that rattly container and use them up. In this example Nurgle themes, boils, pox call em what you want, there is loads of places you can use them.
Sometimes perfect spheres are usable but something with a flat back is easier to glue in place.

Squidge a line of Blue Tac and place the ball you want to use on it.


Grab your sharp knife and carefully cut them in half.


Now you have a selection of pustules to glue on to whatever it is needs a dose of Papa Nurgles love. I Use Liquid Poly in small dabs to glue them on and then a brush to coat them with a bit more Liquid poly to seal them in place better. ( Hence the choice of thin.)

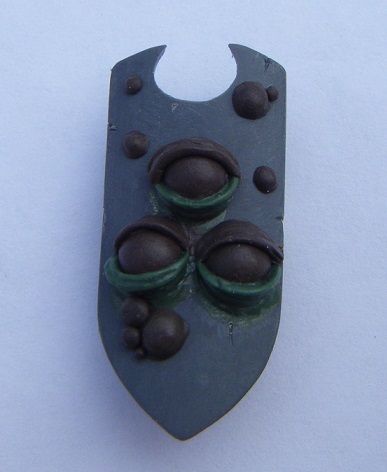
Ovals for Insect eyes.
Pustules
 
Eyes

Rivets,Gems and Eyes


 With extra GS you can add more detail or drill little holes whatever you need and take it as far as you want.
Got a tube making tool, make tubes, vary the shapes around and build up a stock of useful forms to glue and use later on for your Army.

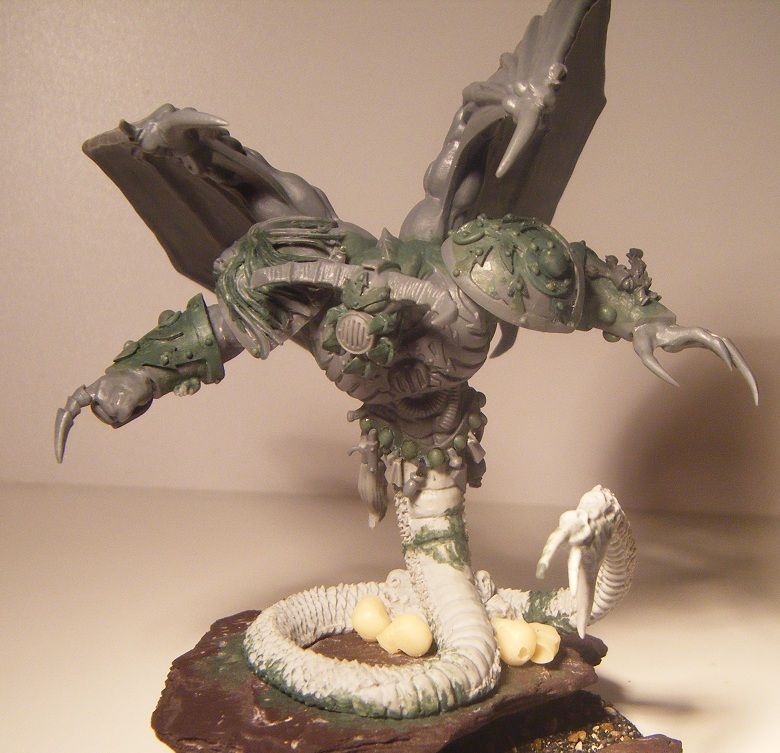
Here is a game of spot the lil Green Balls.........

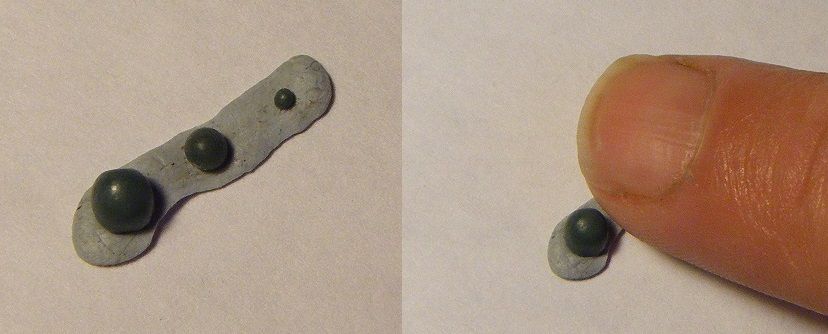
3 lil green balls.


1 lil green ball
5 lil green balls


That game got boring fast din't it lol. But you get the point, why wait for hundreds of little GSed details to cure so an item is safe for attack of the impatient sausage fingers when you can use up wastage to pre prep them and just wait for glue to dry instead?